Pages

Wednesday, 19 June 2013

Yummy Strawberry Scones Recipe

Yummy Strawberry Scones

I have been looking for a delicious scone recipe for ages and today I found it! Made with flour that I bought from the Bakers because believe it or not there are no independent shops in Otley which sell flour!! Please excuse the picture, I am no photographer but I like to put a little picture of what I made on here for you to see! 


Ingredients 
  •  1/2 cup diced fresh strawberries
  • 1/4 cup granulated sugar
  • 2 tablespoons double cream
  • 2 Cups plain (all purpose) flour
  • 1/2 teaspoon salt
  • 1 tablespoon baking powder
  • 6 tablespoons cold butter, cut into pieces
  • 1 large egg
  • 2 teaspoons vanilla extract
  • 2/3 cup diced fresh strawberries

Glaze

  • 3 tablespoons sugar
  • 1 1/2 teaspoons vanilla extract
  • 1 teaspoon water  

1) Preheat the oven to 375°F. Lightly grease (or line with parchment) two baking sheets, or a full-size or mini-scone pan.
2) To make the scones: In a blender or food processor, process 1/2 cup of the strawberries with the sugar and half & half or cream until the mixture is smooth. Set it aside.
3) In a large bowl, whisk together the flour, salt, and baking powder.
4) Work in the butter, using a mixer, your fingertips, a fork, or a pastry blender; the mixture should be unevenly crumbly.
5) In a separate bowl, whisk together the strawberry/cream mixture, the egg and the vanilla extract
6) Add this mixture to the dry ingredients, stirring until the dough just barely starts to come together.
7) Add the 2/3 cup diced strawberries, gently folding them in; the dough will be quite sticky.
8) Drop the dough by heaping tablespoonfuls onto threpared baking sheets; each scone should be about the size of a golf ball. A tablespoon cookie scoop is exactly the right size for this task.
9) Or divide the dough among the compartments of the scone pan of your choice.
10) Make the glaze by stirring together the sugar, water, and vanilla until smooth. Drizzle some atop each scone.
11) Bake the scones until they're just beginning to turn golden brown around the edges, 15 to 16 minutes (on a baking sheet or in a mini-scone pan), or 18 to 20 minutes (in a standard scone pan). Break one scone open, just to be sure; they should be moist (but not gummy) at the center.
12) Serve scones warm. Or allow them to cool completely, and store airtight at room temperature. Just before serving, reheat very briefly in the microwave, or for 5 to 10 minutes, tented with aluminum foil, in a preheated 350°F oven.
Yield: 8 to 18 scones, depending on size. 

Enjoy x 

Sunday, 16 June 2013

Fathers Day

Happy Fathers Day to the most amazing Dads I know.


My Dad is the hardest working man I know, he has always done his absolute best to take care of our family and continues to do so every day. I love you Dad! (p.s he won't like that his face is on here so shhh)

Happy Fathers day to D who is (aside from my dad obviously) the best father I know, who loves his kids so much that he will jump right in there in the ball pool with them. We love you!!

Happy Fathers Day to all the Dads out there, they deserve a cup of tea and a cuddle on their special day!

Wednesday, 12 June 2013

Blue for a rainy day

In an attempt to teach Bear all about colours, I have decided to dedicate one day a week to a colour. This week we had a blue day.
Now we couldn't have a blue day without doing a picture of Thomas (Bears favourite). This would be a really good thing to do with some clear sticky back plastic and a picture underneath. 

 Then we searched the toy boxes and his bedroom for all blue toys to put on our colour tray. 

During nap time I made this using sandpaper and some felt (note:drawing the colours on with a wax crayon doesn't work, I learned that the hard way, use pencil crayon instead)
 since we enjoyed the sticking so much we made another in the shape of a B for Blue or Bear. 

I got most of these ideas from the amazing Georgina at Craftulate she has loads more super amazing ideas to try, I can't wait to do them with Bear. 

Happy Wednesday 

Kirsty x


Tuesday, 11 June 2013

Strawberry and Banana Ice Lolly Recipe

Since we started shopping local, there have been a few our favourite treats that we have been unable to get from independent retailers. So I have been making them myself which has a number of benefits. Firstly I know what is in it, I know where the ingredients have come from and I know there are no additives! Secondly it's really satisfying watching Bear enjoy something I have made myself. So here is a recipe for Strawberry and Banana Ice Lollies which Bear LOVES and I know he's eating lots of yummy fresh fruit!

Strawberry and Banana Ice Lollies 


1 ripe banana (good way to use up those bananas)
1 cup chopped strawberries
1 cup milk
1/2 cup double cream
1 tbsp sugar (use a little more if the strawberries aren't too sweet)

Put all the ingredients into a jug. Blend for a minute or two. Pour into molds and stick them in the freezer for a few hours or if you don't have any of these, pour the mixture into disposable paper cups  and put in the freezer, once they have started to freeze 
(but not completely) pop a lolly stick in and leave in the freezer for a few more hours.
Enjoy!
Reviewed and approved by Bear

Monday, 10 June 2013

Bear and the Magic Railroad

Bear and I LOVE to go for walks with Oliver Biggles (a Dog) and we're always looking for new and exciting places to explore. So hearing rumors of the Old railway line between Otley and Pool, we were very keen to go and discover.

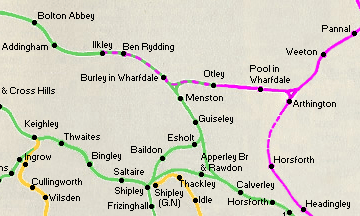
The line was constructed in 1865 and ran from Ilkley - Ben Rhydding - Burley-in-Wharfedale - Otley - Pool-in-Wharfedale - Arthington. The line was then closed in 1965.

Image courtesy of http://www.lostrailwayswestyorkshire.co.uk
 After talking to locals and doing a little bit of Google research, I found that the line used to run right past our house...perfect! The path is not easily accessible and from what I could see there were two points where we could join, one through a field of horses and the other climbing over a metal guard rail at the Leeds road roundabout. I chose the latter as Oliver Biggles can be a little unpredictable around animals. At this point I was feeling rather excited as though we were about to discover a hidden road that would lead somewhere magical! What we found wasn't magical but it was very beautiful. 


Bear really loves seeing all the animals as we walk, he was particularly taken with this Horse and the only way to move him along was to see if he could find some Sheep along the way.

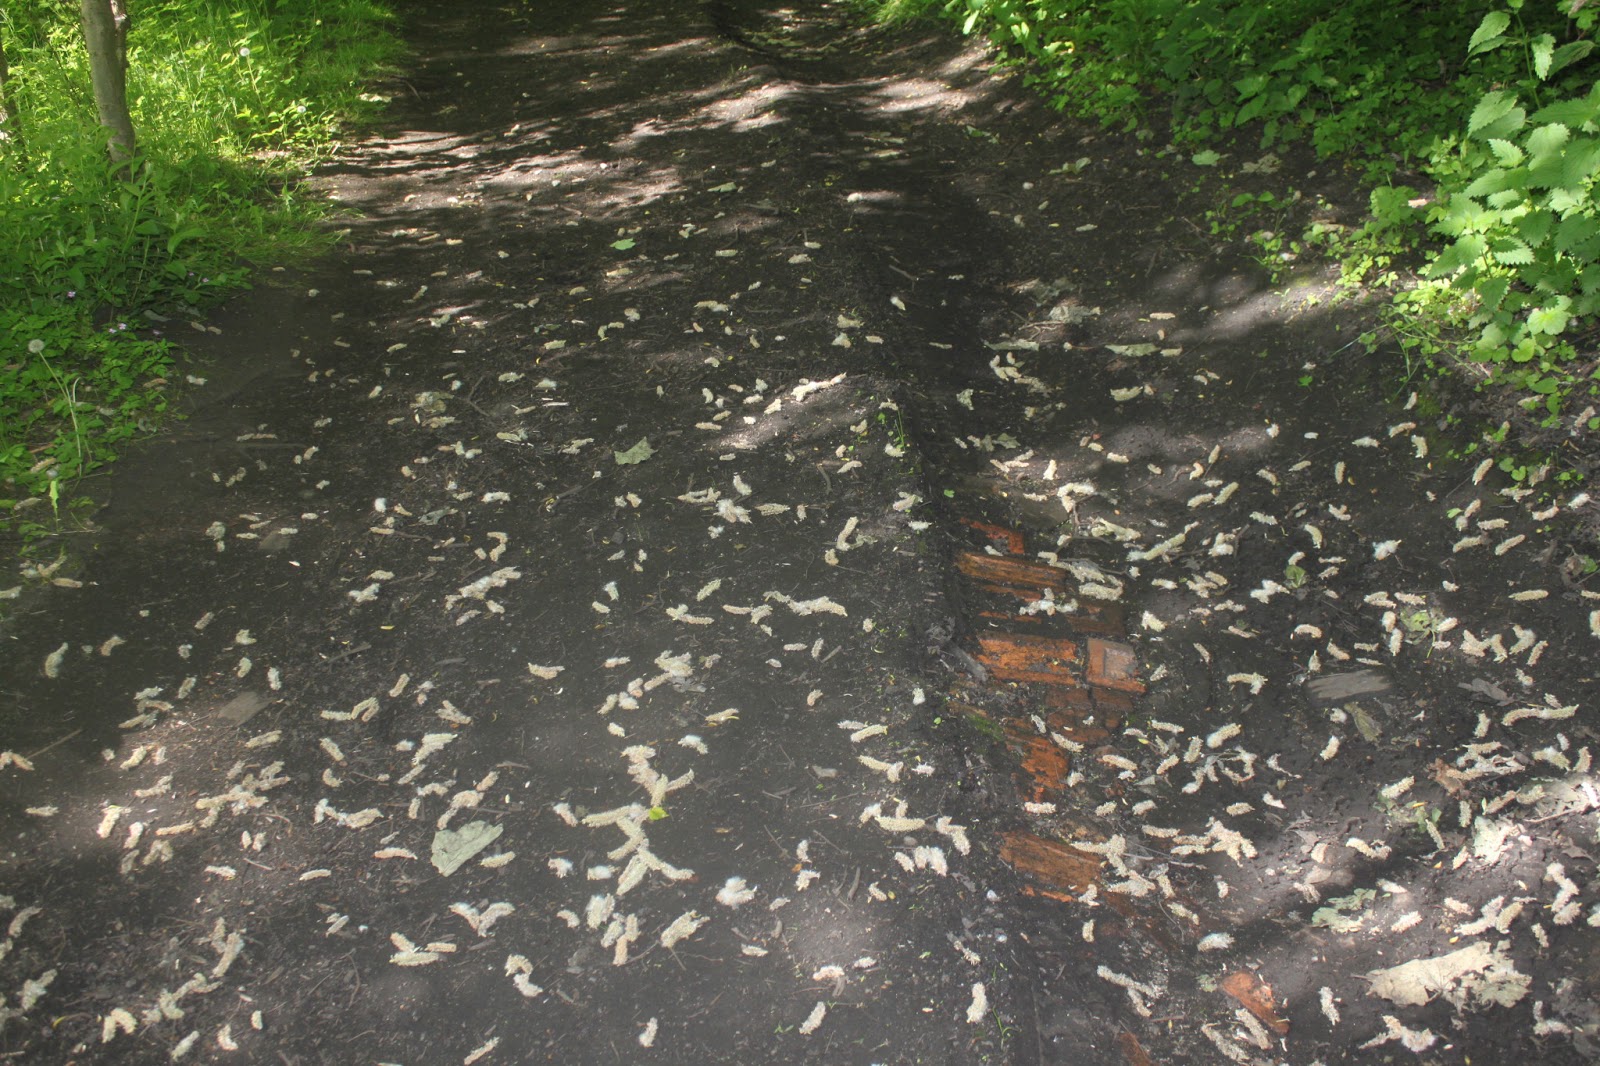
Bricks! I wonder what they were there for....

Very excited when we spotted this bridge! I think Bear was able to understand that choo choo trains used to go here!!


We weren't able to go as far as I would have liked but I'm so glad we found this! Wouldn't it be nice if this was opened up to make an official cycle path?

 I love finding little bits of lost history and I hear there is more to discover! 

Happy Monday,

Kirsty x

Saturday, 8 June 2013

The Great Knaresborough Bed Race

I have lived in the area my whole life and never once been to the Great Knaresborough Bed Race. This year we figured it would be a nice day out and a good opportunity to see friends. For those of you that don't know, The Great Knaresborough Bed Race is a race whereby teams of 6 (+1 on the bed) push a bed round a 3km route through the picturesque and very hilly town finishing through the River Nidd! The event requires each team to decorate their bed, in keeping with the theme of the year and parade it around the town for all to see. They then take off their decorations and race each other for the quickest time. This years theme was Myths and Legends. Here are a few of my favourites...
Love the stormtroopers at the back!


Not even sure what this one is but its beautifully made

I couldn't not include one of my close friends Jon Proctor...He is Mad, like totally off his rockers but we love him!


The Bermuda Triangle, I thought this was brilliant and it turned out to be an old friend of mine who raced with it!
These are just a few of the most unusual ones that I thought were really clever and well made but they were all really amazing! 

We also bumped into a few familiar faces....
On the left is Jon and on the right is Jen AKA Hooters!!! It was so nice to see Jen as she moved to North Carolina about 2 and a half years ago, It was so nice to catch up!
Beautiful twins Sadie and Heather singing in their brilliant band The Directors
So down by the River there was rides for the kids, amusements, food and entertainment. We sat down on our picnic blanket in front of the stage to watch The Directors perform before the race started.  Bear Loved dancing to the music!

And they're off!!!
Jon (again) pushing the bed with his team mates

We had such a lovely day out and the weather was perfect (although probably not for the runners). Such a great tradition bringing communities together and attracting people from all over Yorkshire.
I hope your weekend was as fun as mine.

Happy Saturday

Kirsty x

Mum's Homemade Fruit Cordial

Mum's Homemade Fruit Cordial 

When I was little my mum would make her own fruit cordial. Now I have my own family and in an effort to live more frugally, I decided to ask her for the recipe and make some of my own. 
Here's the recipe

3 Lemons
3 Oranges
1 1/2 Lbs of Granulated Sugar
Heaped tsp Citric Acid
Heaped tsp Tartaric Acid 
Heaped tsp Epsom Salts
1 pint of boiling water

  1. Combine the rind and juice of the lemons and oranges. 
  2. Add the sugar, citric acid, tartaric acid and epsom salts. 
  3. Pour in the boiling water and stir until all the sugar is dissolved. 
  4. At this point I let the mixture cool before straining to remove all the bits. 
  5. Then pour into bottles and dilute to taste...Voila! 
The recipe makes approximately 1.5 Litres of cordial and can be made with any combination of citrus fruits.  

Enjoy x


Follow @GraceHigham22